自己打造一台恩尼格玛密码机
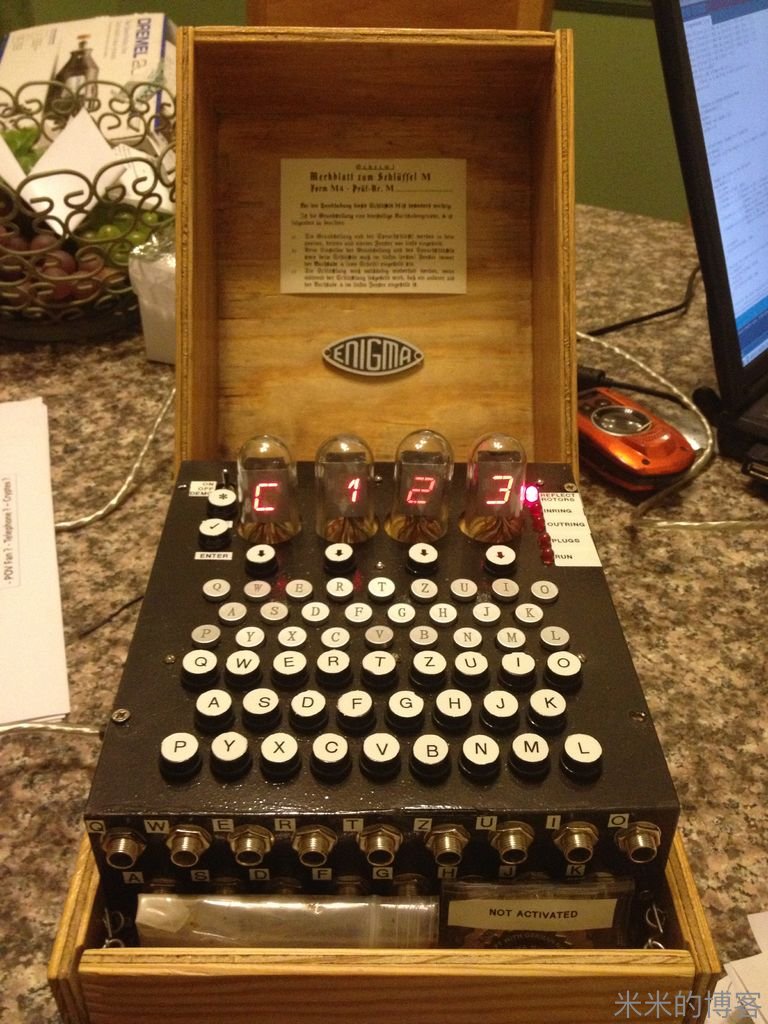
在对称加密学当中,恩尼格玛机绝对是承前启后的存在。它将密码学研究从以前的语言文字学中心完全转移到了数学身上。在这里牵涉的密码并不是我们平时邮箱、银行帐号那种狭义概念,那种顶多叫做口令。这里说的密码就是通过某种映射方式,把一篇文章变得面目全非,以达到保密效果;只有特定的转换规律才能将其解密。这篇文章适于电脑控、军事控、历史控、数学控阅读,请做好烧脑准备。
EDIT: This Instructable has won Second prize in the 2013 Radio Shack Microcontroller Contest. Thank You to all who voted!
按:这个作品是 2013 年无线电单片机竞赛的亚军。感谢所有支持这个作品的你们!
EDIT2: An Open Enigma with fake Standup Nixie Tubes like the ones pictured in this Instructable will soon be available as a Special Kickstarter edition.
This is our very first Instructable and this step by step guide will show you how to build a fully functional electronic replica of the world famous German Enigma machine. This Arduino based Open Source project is able to encrypt & decrypt any Enigma M4 encoded message.
这是我们的初号机。以下教程将手把手教你如何完美复刻史上著名的德国恩尼格玛密码机。这个基于 Arduino 的开源程序能够加解密任何 Enigma 机 M4 型(海军型)的信息。
This first ever fully functional Open Source Enigma "exact" Replica was inspired by the Kid's Game to Arduino Enigma Machine by sketchsk3tch.
这个第一台全功能开源完美 Enigma 机复制品是根据 sketchsk3tch 写的《Kid's Game to Arduino Enigma Machine(从儿童玩具到 Arduino 恩尼格玛机)》所作。
Using Multiplexing for the LEDs, this circuit with 115 light emitting diodes uses only 38 pins and the 36 push buttons use only 4 pins total thanks to properly placed resistors (and the P-Channel MOSFETs) in the keyboard loop. These 4 16-Segment displays & an LED for each keyboard button would add up quickly the total number of pins required and even the Arduino Mega would have ran out of pins without the 2 methods mentioned above....
采用多路复用 LED 电路,仅用 38 个针脚的 115 个发光二极管和 4 个针脚的 36 个按键所连接的整个电路,全靠在键盘回路里准确放置的电阻以及 P 沟道场效应晶体管得以实现。要不然,4 个 16 段显示器,以及每个按键上的 LED 将大幅增加所需针脚总量——即使用了 Arduino Mega 板,但如果没用上述两个方法,电路也不能如此简洁。
In response to the overwhelming demand, we designed the PCB and made it available through www.stgeotronics.com. Skip to Step 10 & beyond for more info. We also offer it as a complete electronics kit & an assembled & tested complete product.
面对电路的超额需求,我们在 http://www.stgeotronics.com 设计了专用的 PCB 板。直接跳到第 10 步和以后的步骤可以找到更多信息。同时,我们也发布了测试过的完整电子组装套装。
Step 1: Proof of Concept on Breadboard
第一步:面包板上的论证
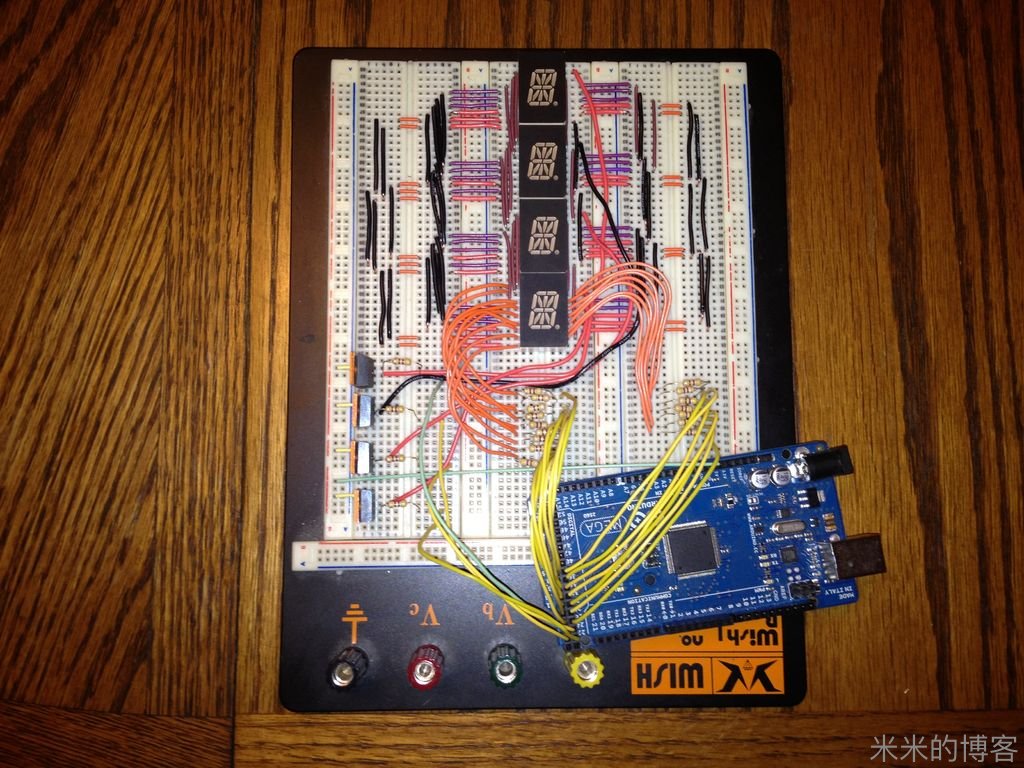
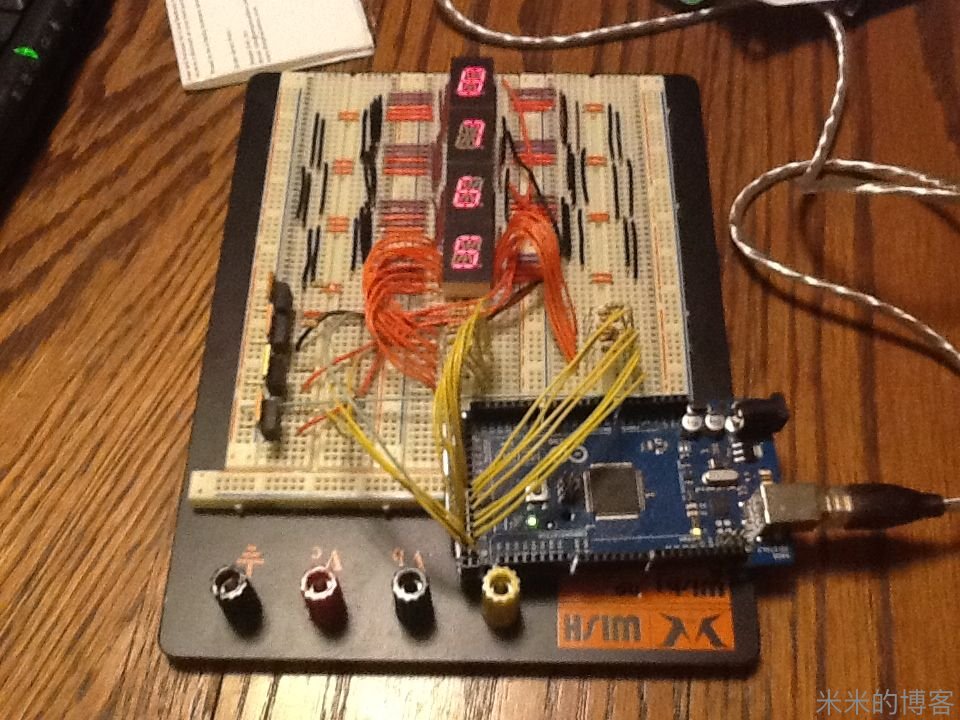
Before going all out on the development of this electronic Enigma replica, we wanted to make sure we could properly drive the 16 Segment LEDs. If we can do that, than we will be able to do everything as the rest is only Math...
在开始制作电子 Enigma 机之前,我们先要确保能驱动 16 段 LED 显示。如果成功,我们就能做接下来的所有步骤——除了数学上的问题,一切都是浮云。
武功山游记
在 7 月下旬,笔者和同学前往江西萍乡的武功山露营,计划观看火星冲日、月全食等天文现象。笔者携带了 Canon EOS 50D 相机,搭配 17-40mm f/4L 镜头,用以记录登山过程中的美景;还向朋友借了一个 70-200mm f/2.8 的长焦镜头,以备不时之需。下面就来用照片分享这次旅途的经历。
先上三组「AN 对比图」。
优胜美地国家公园 vs 武功山金顶


Mac Sky 壁纸 vs 日出前的云海


Unicode 字符与颜文字表情
前言
编码,是每个程序员绕不开的话题。对于前端工程师而言,字符更是会直观地展示在界面上。
提起文字,大部分人的脑中,都会定式为规整排列的字符。但是林子大了什么鸟都有,世界上可是存在着 6800+ 种文字,难免会飞出来一些诡异的鸟…
而号称「万国码」的 Unicode,在实现编码与展示的时候,也会不会遇到一些奇葩的事情呢?
事实上,可能你早已见识过了:
x̙͈̝͍͕̙̄͛̽̆͌́̕͟g̘̣̠̝̟̤̥̼̼̽͑͋̈̑̒͟͞q̛̤̦̝̘͎͋̔̋͌͒̆̋̚͡f̵̢̙͇̮̠̋̀͌̅̉̃̔͜͜͠͡r̢̜̩͙̭̲͓͈̈̀͑̆͋̚͢͜m̷̛͙̝̣̲̭͍͉̊̓̾̈̋̿̚͢͟͠s̷̡̩͔̮͈̜̊̽͂̆̈́̃̓͋̏
热҈的҈字҈都҈出҈汗҈了҈
你的屏幕被蓝翔挖掘机给挖坏了不信你看;̷̸̨̀͒̏̃ͦ̈́̾̀́̎͢҉̵̶͚̼͉͖̺̥͔͇̰̹̮͙͉̻̼̭̻͕̮͇ͨͬͪ͗̇̑̽͋̀̋̊͌ͧͨͭ̓̅͐ͥ̂̔̊ͧ͊҉̶̵̷̞̩̦̳̺̳̬̬̩̣̫͇̯̥͖͍͕̠̦̼̗ͯ̽͌̔ͪͯ́́͋̍ͨ̿̿̎͒ͤ̓̅̀͂ͧ͋̏ͫͣ̔͘͜͠͏̶̵̸̧̧̥̺͓̘̺͎̜̥͕͈̝̫͎̺̮̱̤̠̠͖̳̻̥̣̪͍͕͇̮͙̹̪ͮͧͫ͂͒ͤͣ̌̽ͨͪ͒̄̄̉̒̊ͩ̅͆͘̚͘͘̚͟͟͝ͅ
今天我们就来探讨一下这些奇怪的字符。
文字可以戴帽子和穿鞋子
提起泰文,很多朋友都会立即想到:萨瓦迪卡(你好)。
但这句话是怎么写的呢?
其实这句你好,男生和女生之间还有差异,男生写法是:สวัสดีครับ,女生则是:สวัสดีค่ะ。
不过这并不重要,重要的是,我们发现某些字的上面,还带了特殊的符号。就好像是戴上了帽子。
事实上,泰文字符不仅会「戴帽子」,偶尔还会「穿鞋子」,比如这三个字符:ผ ผู ผู้。
如果脑洞再大一点,有人就会想,那是不是还可以戴多顶帽子呢?
的确如此… 泰文允许你穿一双鞋子,并且戴两顶帽子。完整的形式是这样的:
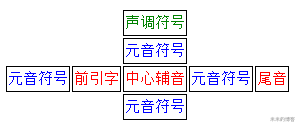
所以,平时看惯了中英文的我们,需要改变一下思路了。
世界上的文字,并不全是规规整整横向排列的格子,也存在像泰文这种变形金刚组合式的文字。
虽然标准的泰文里,「帽子」和「鞋子」的数量是有限制的,但由于国际码的迷之设计(先卖个关子),在计算机里显示的泰文字符,却可以拥有无数的帽子和鞋子。也就是说,它变成了一款可以在 Y 轴无限拓展的文字!
并且,咱不光可以往上喷,还可以有一定角度…
(由于一些系统会崩溃,这里使用截图)


还可以
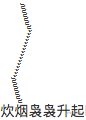
简直是不讲道理。
文字还能倒过来
这里还介绍一个神奇的 Unicode 字符:\u202e,它的作用是让它之后的字符从右到左显示。笔者最早是在微信中发现这个小技巧的,如果昵称中包含这个字符,可以产生奇妙的效果。例如用户:米米
看上去没有什么问题,但实际上是米米\u202e
发送一个表情,就会显示为米米:[动画表情]
如果用在文件名中,还可以起到欺骗的效果,例如:sample_\u202ecod.exe
就会显示为sample_cod.exe
在网页中添加 Live2D 看板娘
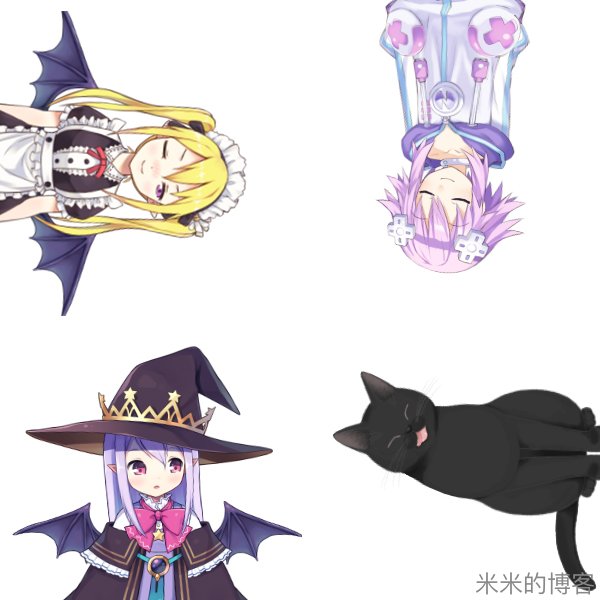
项目地址:live2d-widget
克隆这个仓库到服务器上,并配置autoload.js,修改其中的链接为各文件的绝对地址,即可在网页中添加 Live2D 看板娘(かんばんむすめ)。
相对于市面上广为流传的版本,笔者对触发动作和语言进行了魔改(针对 Hexo NexT 主题),调整了图标样式、元素定位,并解决了 CSS 的前缀等问题。
更多内容可以参考项目文档及下方链接。
快来把萌萌哒的看板娘抱回家吧!
参考文章:
网页添加 Live2D 看板娘
给博客添加能动的看板娘 (Live2D)- 将其添加到网页上吧
本文更新于 2019 年 12 月 30 日:
即日起本插件不再依赖于 jQuery。
本文更新于 2020 年 4 月:
如果修改 fork 之后的版本,并通过 jsDelivr 的 CDN 加载,请务必创建新的 git tag,否则改动不会生效。具体操作见仓库 README 中的说明。
改变世界的 17 个公式
In 2012, Mathematician Ian Stewart came out with an excellent and deeply researched book titled "In Pursuit of the Unknown: 17 Equations That Changed the World."
在 2012 年,数学家斯图尔特(Ian Stewart)出版了一本精彩而深入研究的著作,名为《追寻未知:改变世界的 17 个公式》。
His book takes a look at the most pivotal equations of all time, and puts them in a human, rather than technical context.
他的书着眼于有史以来最关键的方程式,并将它们置于普通人而非专业的背景中。
"Equations definitely can be dull, and they can seem complicated, but that's because they are often presented in a dull and complicated way," Stewart told Business Insider. "I have an advantage over school math teachers: I'm not trying to show you how to do the sums yourself."
「方程式肯定会显得沉闷,而且它们看起来很复杂,但那是因为它们经常以这样的方式呈现,」斯图尔特告诉 Business Insider。 「我比学校的数学老师更有优势:我不会试图告诉你如何自己算出它们。」
He explained that anyone can "appreciate the beauty and importance of equations without knowing how to solve them ... The intention is to locate them in their cultural and human context, and pull back the veil on their hidden effects on history."
他解释说,任何人都可以「欣赏方程式的美丽和重要性,而不去知道如何解它们…… 目的是将它们置于文化和人文环境中,并揭开它们对历史隐藏效应的面纱。」
Stewart continued that "equations are a vital part of our culture. The stories behind them — the people who discovered or invented them and the periods in which they lived — are fascinating."
斯图尔特继续说道,「方程式是我们文化的重要组成部分。他们背后的故事——发现或发明它们的人以及他们生活的时期——都很吸引人。」
Here are 17 equations that have changed the world:
以下是改变世界的 17 个方程式:
Max Nisen contributed to an earlier version of this post.
Max Nisen 为本文的早期版本做出了贡献。
The Pythagorean Theorem
Pythagoras, 530 BC
What does it mean? The square of the hypotenuse of a right triangle is equal to the sum of the squares of its legs.
作用:直角三角形的斜边的平方等于其直角边的平方和。
History: Though attributed to Pythagoras, it is not certain that he was the first person to prove it. The first clear proof came from Euclid, and it is possible the concept was known 1,000 years before Pythagoras by the Babylonians.
历史:虽然认为毕达哥拉斯(Pythagoras)发现了这个公式,但不确定他是否是第一个证明它的人。第一个明确的证明来自欧几里得,而这个概念可能是在毕达哥拉斯之前 1000 年就被巴比伦人知道了。
Importance: The equation is at the core of much of geometry, links it with algebra, and is the foundation of trigonometry. Without it, accurate surveying, mapmaking, and navigation would be impossible.
重要性:勾股定理是几何的核心,它与代数联系起来,是三角学的基础。没有它,准确的测量、地图制作和导航将是不可能的。
In terms of pure math, the Pythagorean Theorem defines normal, Euclidean plane geometry. For example, a right triangle drawn on the surface of a sphere like the Earth doesn't necessarily satisfy the theorem.
在纯数学方面,毕达哥拉斯定理定义了正常的欧几里德平面几何。例如,在像地球一样的球体表面上绘制的直角三角形不一定满足该定理。
Modern use: Triangulation is used to this day to pinpoint relative location for GPS navigation.
现代用途:今天使用三角测量来确定 GPS 导航的相对位置。